Troubleshooting
This guide covers common issues and their solutions when using LinFIR.
Sweep Measurement Issues
Capture Rejected - Clipping Detected
Error Message: Capture rejected: Clipping detected! Reduce input gain and try again.
Cause: The recorded signal exceeded 0 dBFS (digital full scale), causing clipping/distortion.
Solutions:
- Reduce input gain on your audio interface
- Lower driver volume or move microphone further away from the speaker
- Check gain staging throughout the signal chain:
- Audio interface preamp gain
- Mixer/console levels (if used)
- Microphone sensitivity
- Verify microphone input isn’t overloading (check interface clip indicators)
- Use pad/attenuation if your microphone or interface has this option
Prevention: Start with low input gain and gradually increase while monitoring level meters during test sweeps.
Capture Rejected - Signal Too Low
Error Message: Capture rejected: Signal too low (-XX.X dB)! Increase input gain and try again.
Cause: The recorded signal is below -25 dBFS, resulting in poor signal-to-noise ratio.
Solutions:
- Increase input gain on your audio interface
- Raise driver volume or move microphone closer to the speaker
- Check microphone connection:
- Ensure cable is properly connected
- Verify phantom power is enabled (for condenser microphones)
- Test microphone with other software to confirm it’s working
- Verify audio routing:
- Confirm correct input channel is selected in Audio Settings
- Check that no mute or pad switches are engaged
- Ensure audio interface is set as the active input device
Target Level: Aim for peak levels between -12 dBFS and -6 dBFS for optimal signal-to-noise ratio.
Timing Reference Issues
Error Message: Timing reference not detected (correlation too low: -XX.X dB). Check channels and levels.
Cause: LinFIR cannot detect the timing reference signal (Acoustic or Loopback mode).
Solutions:
For Acoustic Timing Reference:
- Verify microphone positioning: Timing reference speaker must be within the microphone’s field
- Check timing reference level: Signal should be audible
- Increase output level of the timing reference channel
- Verify channel routing: Ensure timing reference is sent to the correct output
For Loopback Timing Reference:
- Verify physical loopback cable is properly connected
- Check loopback input channel selection in Audio Settings
- Ensure loopback signal isn’t attenuated (no pads, no gain reduction)
- Test loopback path independently (send signal and monitor input)
Error Message: Timing reference signal is CLIPPING (≥ 0 dBFS). Reduce timing reference output level or input gain to prevent distortion.
Solution: Reduce output level or input gain for the timing reference channel until clipping stops.
No Audio During Sweep
Symptoms: Sweep doesn’t play, or plays but no sound is heard.
Solutions:
- Verify device selection in Audio Settings tab:
- Output device is correct
- Input device is correct
- Channels are properly mapped
- Check hardware connections:
- Audio interface is powered on
- Speakers/amplifiers are connected and powered
- Cables are properly seated
- System audio settings:
- Ensure audio interface is not muted in system settings
- Check exclusive mode settings (Windows)
- Verify sample rate compatibility
- Try different buffer sizes:
- Start with 512 or 1024 samples
- Increase if experiencing dropouts
- Test with another application to confirm audio interface is functioning
Windows Specific: Disable exclusive mode for the audio device in Windows Sound Settings if LinFIR cannot access it.
Poor Quality Measurements
Symptoms: Noisy frequency response, irregular impulse response, inconsistent results.
Solutions:
- Use longer sweep duration:
- Minimum 5 seconds for small rooms
- 10+ seconds for large rooms or outdoor measurements
- Longer sweeps improve signal-to-noise ratio
- Minimize background noise:
- Turn off HVAC systems during measurement
- Close windows and doors
- Avoid traffic noise or other environmental sounds
- Choose quiet times of day
- Ensure stable microphone positioning:
- Use a sturdy microphone stand
- Avoid vibrations from speakers at high SPL
- Mark microphone position for repeatability
- Check for electrical interference:
- Use balanced cables (XLR) where possible
- Avoid running audio cables parallel to power cables
- Check for ground loops (hum at 50/60 Hz and harmonics)
- Use isolated/clean power for sensitive equipment
- Use multiple averages:
- 3-5 averages reduce random noise
- More averages improve consistency at the cost of time
- Verify measurement environment:
- Avoid highly reflective surfaces near microphone
- Ensure speaker is properly positioned
- Check for loose objects that might rattle
Unstable Audio Scheduling (Windows)
Error Message: Recording rejected: unstable Windows audio scheduling.
Cause: Windows audio subsystem experienced excessive timing jitter during capture.
Solutions:
- Close other applications using audio or consuming CPU
- Increase buffer size in Audio Settings (try 1024 or 2048 samples)
- Disable audio enhancements in Windows Sound Settings
- Update audio interface drivers to latest version
- Use ASIO drivers if available for your interface (more stable than WASAPI)
- Disable background services:
- Windows Update
- Antivirus real-time scanning
- Other system services during measurement
- Check power settings: Set to “High Performance” mode
IR Management Issues
File Import Problems
Symptoms: Cannot import WAV or TXT files, or imported data appears incorrect.
Solutions:
WAV Files:
- Verify file format: Only WAV files are supported (16/24/32-bit PCM or float)
- Check file integrity: Ensure file isn’t corrupted or truncated
- Try opening in another audio application
- Re-export from source if needed
- Sample rate must be reasonable: 44.1 kHz to 192 kHz
- Stereo files: LinFIR uses left channel only (mono conversion)
- Check file permissions: Ensure LinFIR has read access to the file
TXT (IR) Files:
- Format must be simple: One sample per line, decimal values
- Sample rate prompt: LinFIR will ask for sample rate (not stored in TXT)
- Check for non-numeric characters: Remove headers, comments, or invalid data
- Use proper decimal separator: Period (
.) not comma (,)
FRD (.frd or .txt) Files (REW format):
- Two-column format: Frequency (Hz) and Magnitude (dB)
- Tab or space delimited
- Check frequency range: Should cover at least 20 Hz to 20 kHz
- Phase column: Optional third column for phase (degrees)
Windowing Not Working
Symptoms: IR windowing doesn’t change the impulse response, or produces unexpected results.
Solutions:
- Verify time values:
- Stop Time must be > Start Time
- Times must be within IR duration
- Window times are in milliseconds, not samples
- Preview impulse response to verify window placement:
- Open Driver IR window
- Check impulse response plot
- Adjust Start/Stop times visually
- Common windowing scenarios:
- Early reflections removal: Set Stop Time before first strong reflection
- Noise truncation: Set Stop Time when IR decays into noise floor
- Leading silence removal: Set Start Time just before main impulse peak
IR Names Not Showing
Symptoms: Imported or measured impulse responses don’t have names, or show default names.
Explanation: LinFIR does not automatically set IR names based on filenames or measurements.
Solutions:
- Manually enter IR name:
- Open Driver IR window
- Type name in “IR Name” field
- Press Enter or click outside field to confirm
- Import and measurement operations:
- WAV import: No automatic naming
- Sweep measurement: No automatic naming
- FRD import: No automatic naming
- Save project to persist custom names:
- Use Cmd+S / Ctrl+S to save
- IR names are stored in project file
Best Practice: Name impulses immediately after import/measurement to avoid confusion later.
Audio Settings Issues
Device Not Listed
Symptoms: Expected audio interface doesn’t appear in device dropdown menus.
Solutions:
- Click “Refresh Devices” to rescan audio hardware
- Check audio interface:
- Ensure interface is powered on
- Verify USB/Thunderbolt connection is secure
- Try different USB port or cable
- Verify drivers are installed:
- Mac OS: Core Audio drivers (usually automatic)
- Windows: ASIO or manufacturer-specific drivers
- Close other applications using the audio interface:
- DAWs (Pro Tools, Logic, Ableton, etc.)
- Media players
- Communication apps (Zoom, Microsoft Teams, etc.)
- Try different sample rates or buffer sizes in LinFIR settings
- Restart LinFIR after connecting/disconnecting devices
- System permissions (Mac OS):
- Go to System Settings > Privacy & Security > Microphone
- Ensure LinFIR has microphone access
Configuration Invalid
Error: Audio configuration shows as invalid or cannot be applied.
Causes and Solutions:
-
Device disconnected:
- Selected input/output device is no longer available
- Click “Refresh Devices” and reselect devices
-
Channel count exceeds device capabilities:
- Verify device has enough input/output channels
- Check channel mapping (e.g., selecting channel 8 on a 2-channel interface)
-
Sample rate not supported:
- Audio interface may not support selected sample rate
- Try common rates: 48 kHz, 96 kHz, 44.1 kHz
- Check interface specifications
-
Buffer size incompatible:
- Some devices have minimum/maximum buffer size limits
- Try 512 or 1024 samples as a safe default
-
Exclusive mode conflicts (Windows):
- Another application may have exclusive control
- Disable exclusive mode in Windows Sound Settings
- Close competing applications
Recovery Steps:
- Click “Refresh Devices”
- Select “Default” input and output devices
- Choose a common sample rate (48 kHz)
- Set buffer size to 1024 samples
Filter Processing Issues
FIR Correction Not Applying
Symptoms: Enabling FIR correction doesn’t change frequency response.
Solutions:
- Check correction is enabled:
- Magnitude and/or Phase correction must be toggled ON
- Verify correction range (Max. Attenuation) is non-zero (e.g., 10 dB)
- Check frequency range covers desired bandwidth
- Verify target curve:
- Check that your reference points are defined correctly
- Reference shouldn’t be identical to measurement (no correction needed)
- Check causality setting:
- Linear phase (causality = 0): Maximum pre-ringing
- Minimum phase (causality = 1): No pre-ringing, phase distortion
- Mixed causality (0 < causality < 1): Balanced trade-off
- Increase filter length if correction is insufficient:
- Longer FIR = better correction accuracy
- Try doubling N taps (e.g., 2048 → 4096)
- View FIR filter response in Filters mode (F key):
- Switch to display mode “FIR Filters”
- Verify correction filter shape matches expectation
- Check FIR time alignment:
- Verify that the FIR coefficients are properly centered within the available taps
- Try changing FIR Offset Delay value to recenter FIR’s energy
- Enable Auto Causal Alignment in Settings and let LinFIR handle this process for you
Cannot See IIR Filter Effects
Symptoms: IIR filters are defined but don’t affect the frequency response.
Causes and Solutions:
-
IIR toggle is disabled:
- Click the “IIR Filters” toggle in the driver toolbar to enable it
- Both Manual IIR and Auto-EQ tabs share this same master toggle
-
Wrong tab is active:
- LinFIR has two separate IIR filter tabs: Manual and Auto-EQ
- Only the active tab’s filters are applied
- Click the tab you want to use to make it active
- You can have filters in both tabs, but only one tab is active at a time
-
No filters are enabled:
- In the active tab, verify that individual filters have their “Enabled” toggle ON
- Disabled filters are ignored even if the tab is active
-
Switching between Manual and Auto-EQ:
- Manual IIR tab: Manually configured filters (HP, LP, PEQ, shelves, etc.)
- Auto-EQ tab: Auto-generated or manually tweaked parametric EQ filters
- Use “Clone from Auto EQ” button to copy Auto-EQ filters to Manual tab
- Both tabs can coexist with different filter sets, but only one is active
Auto-EQ Not Matching Target
Symptoms: Auto-EQ result doesn’t match target curve well.
Solutions:
- Increase max filters allowed:
- More filters = better target matching
- Try 8-12 filters for complex targets
- Check frequency range:
- Auto-EQ only operates within specified f_min to f_max
- Reduce range if needed (e.g., 80 Hz to 16 kHz)
- Verify target curve is reasonable:
- Avoid extreme target shapes requiring >20 dB boost
- Use smooth target curves for better results
- Check smoothing:
- Over-smoothed measurements may prevent accurate matching
- Try 1/12 or 1/24 octave smoothing
- Run Auto-EQ again:
- Click “Run Auto EQ” to recompute
- Different starting conditions may produce better results
HFD Export Issues
Sample Rate Error
Error: HFD export requires 93.75 kHz sampling rate. Current: 96000 Hz
Solution: Hypex FA series amplifiers operate at 93.75 kHz internally.
Steps:
- Go to Target DSP Settings in the left column of the main window
- Change Sampling Frequency to 93.75 kHz
- Retry HFD export
Note: Changing sample rate will trigger re-processing of all filters.
Biquad Limit Exceeded
Error: Tweeter has 18 biquads but HFD supports max 15 biquads per channel
Cause: The sum of global IIR + driver IIR exceeds 15 biquads per output channel.
Solutions:
- Reduce IIR filter count:
- Remove unnecessary PEQ filters
- Combine shelves into broader adjustments
- Use fewer global IIR filters
- Reduce Auto-EQ filter count:
- Lower “Max Filters” setting in Auto-EQ
- Simplify target curve to require fewer filters
- Move filters to FIR domain:
- FIR crossovers instead of IIR (if tap budget allows)
- FIR correction instead of many PEQ filters
- Check biquad count for each filter type (see table in Export documentation)
Example:
- Driver IIR: LR4 HP, LR4 LP, 12× PEQ
- Total: 16 biquads ❌ Exceeds limit
Solution: Reduce PEQs to 11 filters → Total: 15 biquads ✅
FIR Length Exceeded
Error:
Global FIR has 6000 taps but Input position supports max 4500 tapsWoofer has 2000 taps but Output position supports max 1500 taps per channel
Cause: FIR filter length exceeds Hypex hardware limits.
Solutions:
For Input FIR (Global, 4500 taps max):
- Reduce Global FIR N taps in Global FIR Correction settings
For Output FIR (Per-channel, 1500 taps max):
- Reduce Driver N taps in driver settings
Decision Guide:
- Input FIR: Best for global room correction shared across all channels
- Output FIR: Best for per-driver crossovers and correction
Performance Issues
Slow Processing / UI Lag
Symptoms: LinFIR feels sluggish, filters take long to compute, UI updates are delayed.
Solutions:
- Reduce filter complexity:
- Lower FIR tap count (e.g., 4096 → 2048)
- Fewer IIR filters
- Disable unused filters
- Reduce graph resolution:
- Settings > Graphs > Plot Resolution
- Lower resolution = faster rendering
- Disable unnecessary graphs:
- Hide graphs you’re not using (M, P, G, I, T, K keys)
- Fewer visible graphs = less computation
- Close detached graph windows when not needed
- Check system resources:
- Close other CPU-intensive applications
- Ensure sufficient RAM available
- Reduce angle step in polar measurements:
- Try 10° or 15° steps instead of 5°
High Memory Usage
Symptoms: LinFIR consumes excessive RAM, system becomes slow.
Causes:
- Many drivers with long IRs: Each driver stores full impulse responses
- Many polar measurements: Full impulse responses are also stored for each measurement angle
- High-resolution graphs: More points = more memory
Solutions:
- Reduce IR length re-import externally generated IRs with proper windowing and truncation
- Use lower sample rates if 192 kHz is not needed
- Reduce N taps for FIR filters
- Reduce graph resolution Settings > Graphs > Plot Resolution
Project File Issues
Cannot Load Project
Error: Failed to load project or similar error when opening .lnf file.
Solutions:
- Check file integrity:
- Verify file size is reasonable (not 0 bytes)
- Legacy format migration:
- Older LinFIR versions may use incompatible format
- LinFIR attempts automatic migration, but may fail
- Try opening in latest LinFIR version
- Corrupted project:
- If file was saved during a crash, it may be incomplete
- Restore from a backup
- File permissions:
- Ensure LinFIR has read access to the file
- Try copying file to a different location
Prevention: Enable auto-save to save every 60 seconds.
Auto-Save Not Working
Symptoms: Projects don’t auto-save, or auto-save notifications don’t appear.
Verification:
- Auto-save is enabled by default
- Auto-save runs every 60 seconds in the background
- Auto-save only works if project has a saved path (use Cmd+S first time)
Troubleshooting:
- Save project manually first (Cmd+S) to establish a file path
- Check for errors: Look for error notifications in top-right corner
- Verify file permissions: Ensure LinFIR can write to project directory
- Check disk space: Ensure sufficient free space on drive
Note: Auto-save interval cannot be configured (fixed at 60 seconds).
License & Activation Issues
Directivity Features Locked
Symptoms: Cannot access the directivity analysis window (R key doesn’t work), directivity features grayed out.
Cause: Directivity analysis requires a valid license.
Solutions:
- Verify license status: Settings > License tab
- Activate license: Enter license key if you have one
- Check license expiration: Licenses may have time limits (trial)
- Mode requirement: Directivity is only available in Loudspeaker Design mode (not Room Calibration)
- Check internet connectivity: First activation (or deactivation) requires internet connectivity
Note: Free version includes all core loudspeaker design features but excludes advanced directivity analysis.
Getting Help
Bug Reports
LinFIR includes a built-in bug report feature to help diagnose issues:

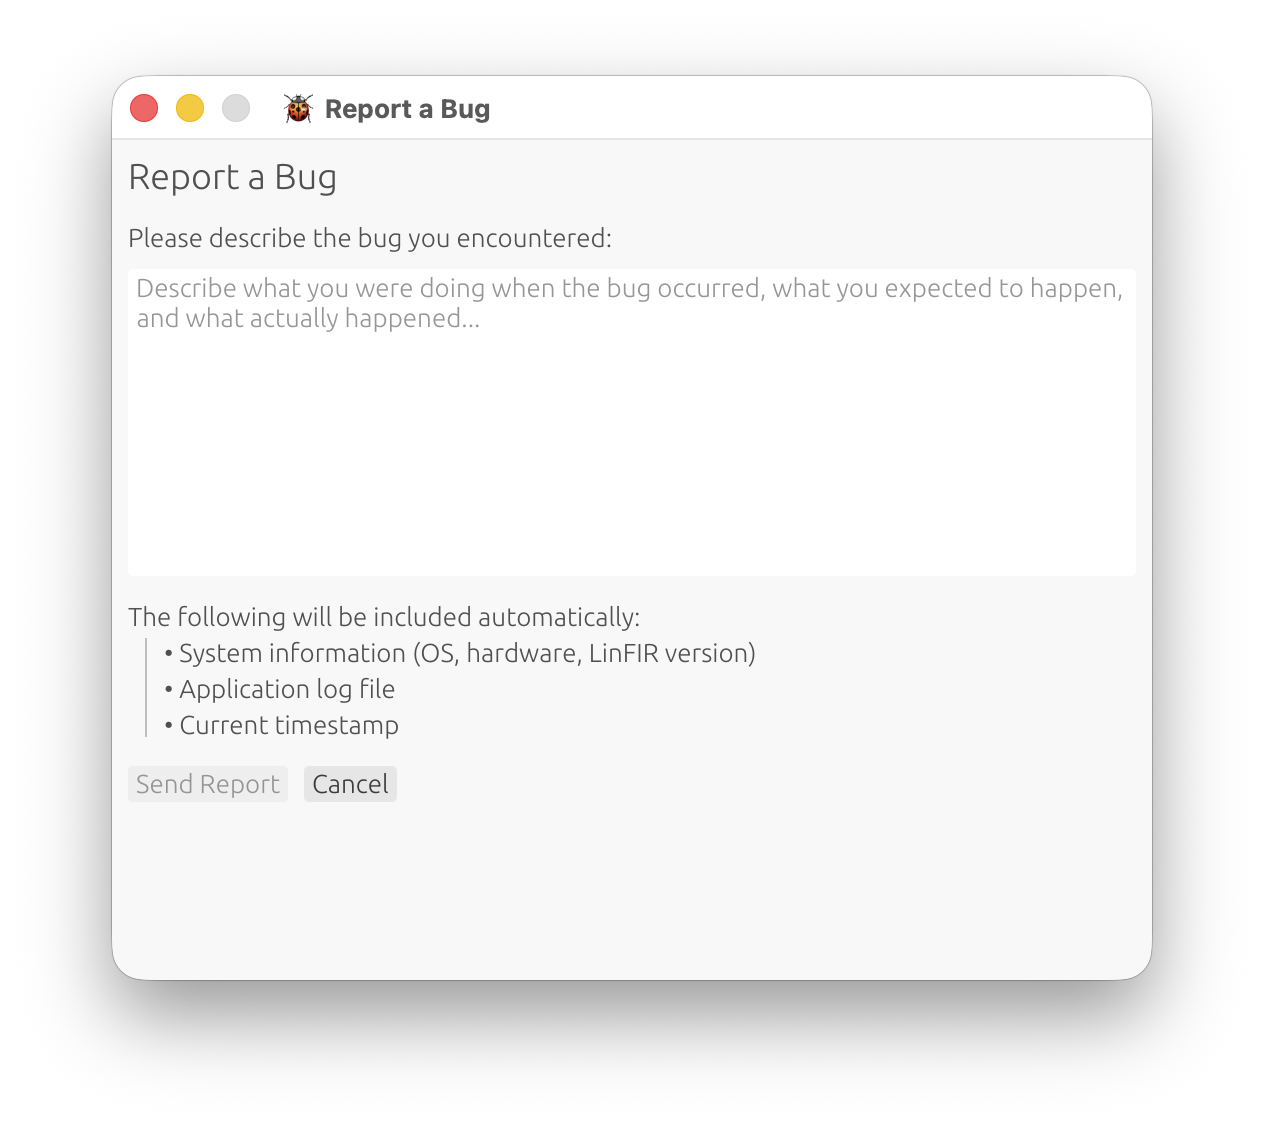
To Submit a Bug Report:
- Go to Help > Report a Bug
- Describe the issue clearly:
- What you were doing when the problem occurred
- What you expected to happen
- What actually happened
- Include steps to reproduce (if possible)
- Click “Submit”
Privacy:
- No personal information is transmitted
- No project data is included
- Only relevant log information and system details are sent
What to Include:
- Clear description of the bug or unexpected behavior
- Exact steps to reproduce the issue
- Expected vs. actual outcome
- System information: OS version, audio interface model (if relevant)
- Error messages (if any appear)
Community & Support
Additional Resources:
- User Manual: Press H to open embedded documentation
- Release Notes: Check for known issues and recent fixes
- Email Support: Contact developer for persistent issues
Before Reporting:
- Check this troubleshooting guide
- Verify you’re using the latest LinFIR version
- Test with a fresh project to isolate the issue
- Try restarting LinFIR and your audio interface
Related Documentation
- Audio Configuration - Detailed audio settings and device configuration
- Sweep Measurements - Measurement procedures and best practices
- IR Management - Importing, windowing, and managing impulse responses
- Export & Project Management - HFD export requirements and validation
- Keyboard Shortcuts - Quick reference for all shortcuts