Graphs Settings
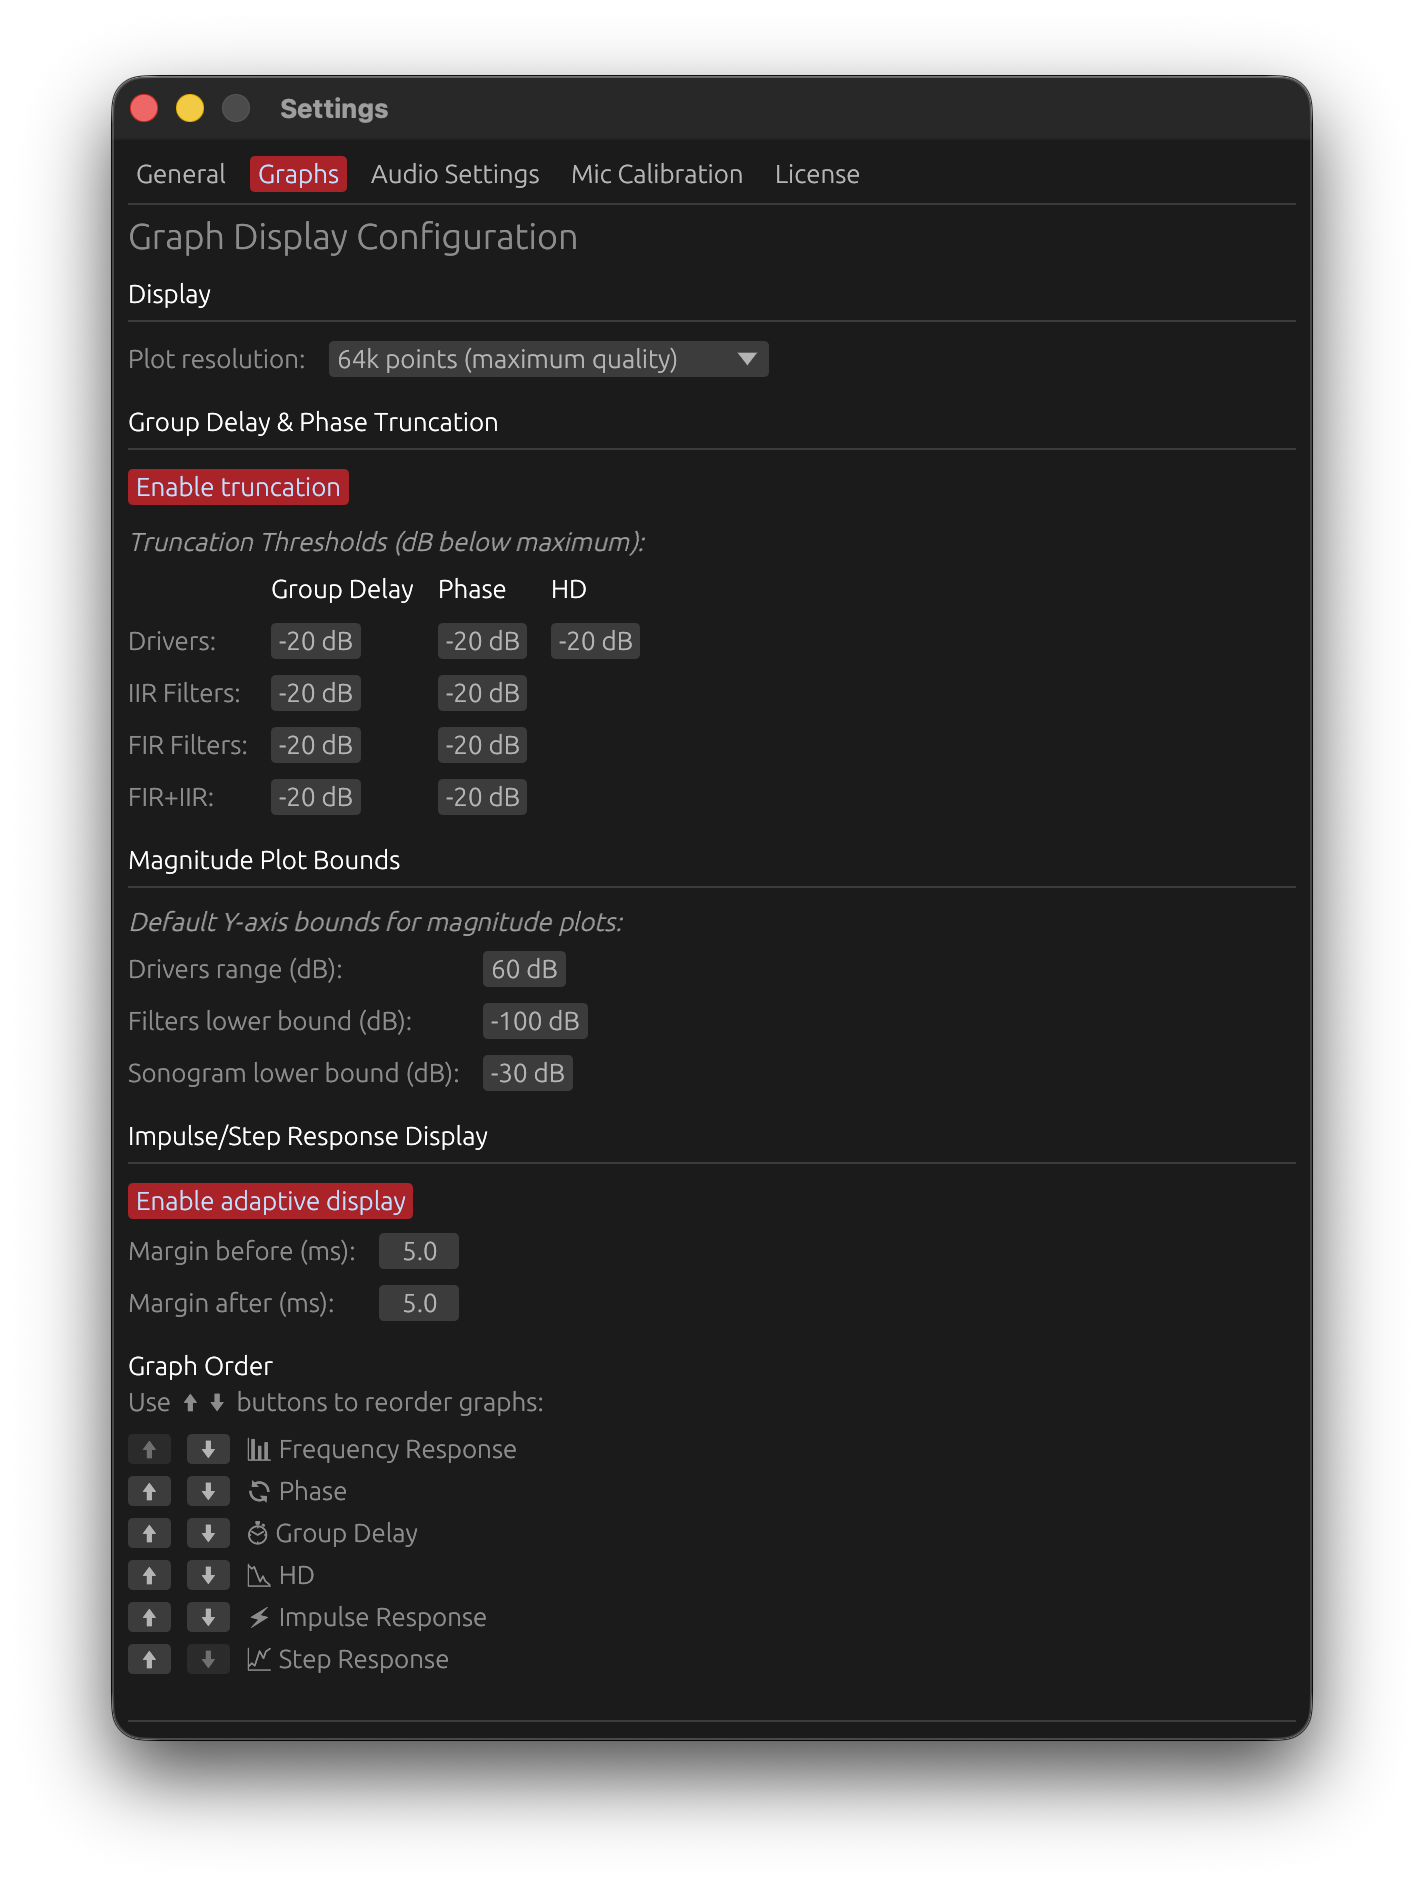
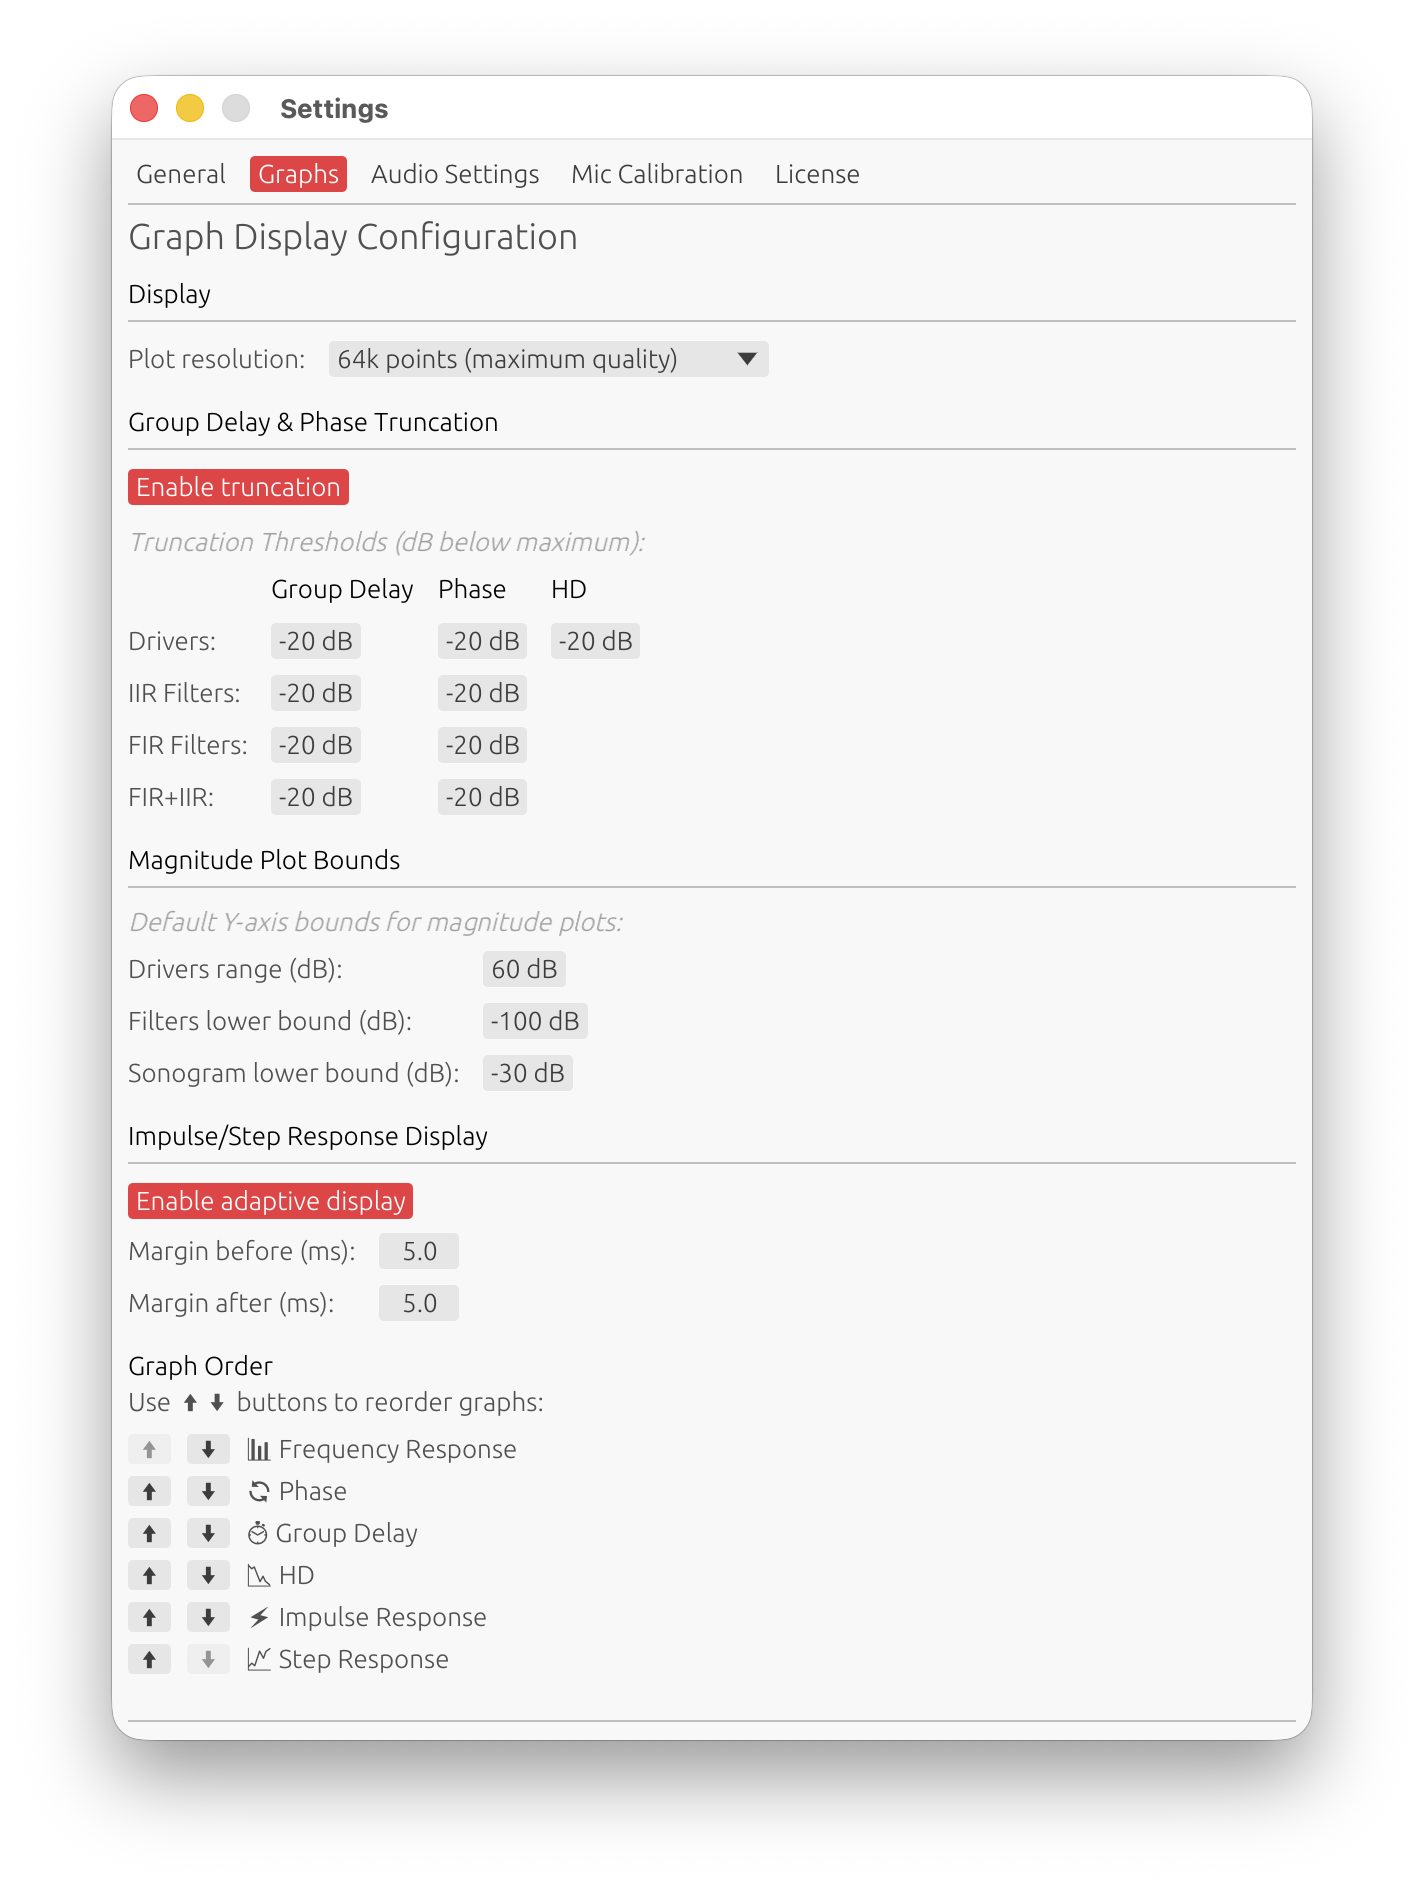
The Graphs tab controls how the plots are computed and displayed. Some rows act on the current project (crossover smoothing, truncation, plot bounds); others are defaults for new projects (graph order and visibility).
Sections, in tab order: Display, Group Delay & Phase Truncation, Frequency Axis, Magnitude Plot Bounds, Directivity Sonogram, Spectrogram, Impulse/Step Response Display, Response Overlays, Graph Order, Default Visibility, Default Overlays.
Appearance, filter-processing and new-project value defaults live on the General tab, not here.
Display
Plot resolution
Options: 16k points (faster), 32k points (balanced), 64k points (maximum quality) Default: 64k points
Number of frequency points used to compute filter and driver responses.
- Higher resolution → finer low-frequency detail in the magnitude, phase and group-delay plots
- Affects computation time for filter and measurement responses, not filter quality
- Drop to 16k or 32k on slower systems or with very long filters
Steep crossover smoothing
Default: enabled · acts on the current project (adaptive_crossover_smoothing).
Reduces the frequency-response smoothing near crossover frequencies so a steep filter’s true slope stays visible instead of being rounded off.
Reduction vs. effective acoustic slope — linear from 12 to 36 dB/oct, then held at 100 %:
| Effective slope | Smoothing reduction |
|---|---|
| ≤ 12 dB/oct (1st / LR2 / 2nd-order Butterworth) | none |
| 18 dB/oct (3rd-order Butterworth) | ~25 % |
| 24 dB/oct (LR4 / 4th-order Butterworth) | ~50 % |
| 30 dB/oct (5th-order Butterworth) | ~75 % |
| ≥ 36 dB/oct (LR6 and steeper) | 100 % |
| Brickwall FIR, or an IIR-derived cutoff (slope unknown) | 100 % |
At full reduction the smoothing drops to 1/96 octave at the cutoff. The reduction fades in over the 0.5 octave of passband next to the cutoff (smoothstep), reaching its minimum at the cutoff itself. Only the magnitude display curves are affected — phase, group delay and filter generation are untouched.
When disabled: uniform smoothing everywhere, matching external tools that use constant smoothing (which then show gentler crossover slopes than LinFIR’s adaptive mode).
Group Delay & Phase Truncation
Hide the group-delay and phase curves outside the active magnitude region.
Enable truncation
Default: enabled
When on, a curve is drawn only where its reference magnitude exceeds max + threshold. When off, the full curves are shown (“(showing full curves)” appears next to the toggle). Purpose: keep phase / GD out of stop-bands and cut visual clutter.
Truncation thresholds
A grid of DragValues, dB below the maximum, range −120 to 0 dB, all defaulting to −20 dB:
| Context | Group Delay | Phase | HD |
|---|---|---|---|
| Drivers | −20 dB | −20 dB | −20 dB |
| IIR Filters | −20 dB | −20 dB | — |
| FIR Filters | −20 dB | −20 dB | — |
| FIR+IIR | −20 dB | −20 dB | — |
- −20 dB means “show the curve only where magnitude > (max − 20 dB)”
- The reference magnitude matches the context — FIR curves use the FIR magnitude, drivers use the driver magnitude, etc.
- HD (harmonic distortion) truncation exists for the Drivers context only
Frequency Axis
The frequency range shown on every frequency-axis graph in the app (current project).
Min frequency (Hz)
Range: 1 Hz to (Max frequency − 1 Hz) · Default: 10 Hz
Max frequency (Hz)
Range: (Min frequency + 1 Hz) to 96 000 Hz · Default: 24 000 Hz
Reset
Restores both fields to 10 Hz / 24 000 Hz.
These two values replace what used to be a fixed range hardcoded per graph. They now drive:
- Magnitude, Phase, Group Delay, HD — the default/reset X-axis range, and which data points are drawn at all (a point outside
[Min, Max]is dropped, not just scrolled off-screen) - Directivity Sonogram — both the frequency range the heatmap image is sampled over and its on-axis overlay plot’s default range; a change regenerates the sonogram image
- Spectrogram — only the range its own window opens with. It has an independent Frequency Range control with its own Reset button — once opened, it no longer tracks changes made here except when that Reset is clicked.
Narrowing the range does not change how filters or the FIR/IIR chain are computed — it only affects what the graphs draw. It is independent of Sync X-axis: synced or not, “full range” now means this setting instead of a fixed 10 Hz – 24 kHz.
Magnitude Plot Bounds
Default Y-axis bounds for magnitude plots (current project).
Drivers range (dB)
Range: 20 – 200 dB · Default: 60 dB
Y-axis span for driver / measurement magnitude plots, drawn from max_response − range to max_response + 5 dB.
- 20–40 dB — zoomed, emphasises small variations
- 60–80 dB — good for most designs
- 100–200 dB — wide view of the full range
Filters lower bound (dB)
Range: −200 to −20 dB · Default: −100 dB
Lower Y-axis bound for filter magnitude plots (FIR, IIR, FIR+IIR).
- −40 dB — focus on the pass-band
- −100 to −200 dB — show deep stop-band attenuation
Directivity Sonogram
License-gated analysis window. These rows sit just below the magnitude-bound rows in the tab. The sonogram’s frequency range itself is set by Frequency Axis above, not here.
Sonogram lower bound (dB)
Range: −100 to −10 dB · Default: −30 dB
Bottom of the directivity-sonogram colour scale. Narrowing it exposes low-level decay / room modes; a change regenerates the sonogram image.
Highlight sonogram clipping
Default: enabled
Draws sonogram levels above the colormap maximum in off-white (fading from red over about 1 dB) instead of letting them saturate to the same red as the loudest in-range energy — so it is obvious where per-band normalization pushes the response over the reference level. Turn it off to have over-range values saturate to red.
Sonogram normalization
Options: Global max., Normalize to 0°, Normalize to 0° (per freq), Normalize to ±10° avg (per freq) Default: Global max.
The normalization mode the directivity sonogram opens with. It can still be changed per-session from the sonogram’s own toolbar. See Directivity Analysis.
Spectrogram
License-gated analysis window. See Spectrogram. Its frequency range is seeded by Frequency Axis above but adjustable independently from its own window — see Frequency Range.
Spectrogram lower bound (dB)
Range: −120 to −10 dB · Default: −30 dB
The Min dB value the spectrogram opens with, and what its Reset button restores. It also drives the time crop. It can still be changed per-session from the spectrogram’s own toolbar.
Spectrogram axes
Options: Time × Freq (time on X), Freq × Time (frequency on X) Default: Time × Freq
The axis layout the spectrogram opens with. The spectrogram’s toolbar button still swaps it per-session. See Spectrogram.
Spectrogram detail
Options: Standard (2048), High (4096), Ultra (8192) · Default: High (4096)
The size of the spectrogram compute grid — the number of frequency bins and time points the transform runs on before it is sampled onto the image. Higher is sharper but slower and more memory (Ultra ≈ 4× the compute time and ~256 MB per recompute). See Spectrogram → Detail.
Impulse/Step Response Display
Enable adaptive display
Default: enabled
Detects the signal boundaries (threshold 1/1000 of peak amplitude) and shows only that portion of the impulse and step responses, plus the margins below. When off, the complete impulse response (full tap length) is always shown — useful to inspect zero-padding, awkward with long IRs.
Margin before (ms)
Range: 0 – 50 ms · Default: 5 ms — keeps pre-ringing and early arrivals visible.
Margin after (ms)
Range: 0 – 100 ms · Default: 10 ms — captures the decay tail and late reflections.
Response Overlays
The Listening Window, Predicted In-Room Response and Directivity Index overlay toggles moved to the Graphs dropdown in the graph toolbar, alongside a new Sum / Average toggle - see Graph Visibility Toggles. Each project now remembers its own choice for these four; this tab only sets what a new project starts with - see Default Overlays below.
Show raw response when filter windows are open
Requires a valid license — without one the toggle is greyed out and the overlay isn’t drawn.
Default: enabled
When a filter window is open and in the foreground, a dashed overlay of that driver’s pre-filter response (gain + windowing only, no FIR/IIR) is drawn on the frequency, phase and group-delay graphs.
- Triggered by any per-driver LP / HP / correction / IIR window, or the Global FIR Correction / Global IIR window (the latter show the unfiltered sum / average)
- Only the window in the foreground counts: with several filter windows open, only the driver (or sum) of the window you are working in is overlaid, and nothing is shown when all filter windows are in the background
- Coloured to match the driver’s curve; the global overlay is white (dark mode) / black (light mode)
Use it to see how much correction a filter applies without toggling it off.
Graph Order
Drag a graph by its ☰ grip or its name and drop it above or below another one, or use the ⬆ ⬇ buttons to move it one step. The order applies to the graph stack immediately and is saved as the default layout for new projects.
The graphs can also be reordered directly in the main window, by dragging their title — see Reorder Graphs.
Default Visibility
A toggle per graph type (Frequency, THD, Group Delay, Phase, Impulse, Step) choosing which graphs are shown by default in new projects.
Default Overlays
A toggle per magnitude overlay curve (Sum / Average, Listening Window, Predicted In-Room Response, Directivity Index) choosing which are shown by default in new projects. Each project then remembers its own choice from the Graphs dropdown in the graph toolbar - see Graph Visibility Toggles.
Performance Considerations
Real-Time Filter Processing Architecture
LinFIR differs from traditional FIR design software in how it processes and displays results.
Real-time (“online”) filter generation:
- Filters are generated and applied to driver impulse responses in real time as you interact with the UI
- The complete signal-processing chain is computed immediately as you adjust parameters
- You see the true response of the entire chain instantly, including every windowing artifact
Why this matters:
- Immediate feedback — no “generate” / “apply” button
- Transparency — shows exactly what the filters can and cannot do, with all artifacts visible
- Accuracy — no approximation or preview mode
Filter Application Methods
FIR filters — applied via fast convolution (multiplication in the Fourier domain); cost scales with filter length and measurement count.
IIR filters — applied via recursive difference equations (time domain); extremely efficient regardless of complexity.
Performance Impact Factors
Filter length:
- Up to 4096 taps — negligible impact on modern CPUs
- 4096 – 8192 taps — slight delays on slower systems
- > 8192 taps — can noticeably slow interactive adjustments
Off-axis measurements: each angle re-runs the full filter chain — many angles + long filters means longer updates.
Driver count: every enabled driver adds a filter chain that must be summed; cost grows roughly linearly with driver count and multiplies with angles per driver.
Large Multi-Driver Projects (Sound Reinforcement)
Loudspeaker Design mode accepts up to 50 drivers, which makes it suitable for aligning a complete sound-reinforcement system — a line array, its subwoofer arrays, and the front fills, each cabinet or zone captured as a separate driver.
This is a supported workflow. Drivers are normally measured on-axis only (one measurement per cabinet or zone), so the load stays close to driver count × filter length:
- A 50-driver project recomputes 50 full convolution chains on every parameter change
- With filters of 8192 taps or more, dragging a crossover or sweeping a gain can become sluggish
- Recommendation: keep filter lengths at or below 4096 taps while setting up and aligning a large system, and only raise the tap count at the end if low-frequency resolution genuinely requires it
Edge case — polar measurements on many drivers at once
Capturing full polar (off-axis) sets for many drivers at the same time multiplies the cost rather than adding to it: 30 drivers × 19 angles is 570 complete filter chains per update. If you need directivity data alongside a large alignment project, capture polar sets for a few representative cabinets only, or keep that analysis in a separate, smaller project.
Room Calibration mode is unaffected. Polar measurements are not available there, so a 50-measurement room project only carries the linear cost of the measurement count.
Additional measures for large systems:
- Reduce plot resolution to 16k or 32k points
- Clipping detection runs in the background and doesn’t slow the graphs down; disabling it (Settings → General) only frees some CPU time on very large projects
Background Processing for Responsiveness
Priority (synchronous, immediate): the on-axis (0°, 0°) measurement, the currently displayed angle, and filter parameters.
Background (asynchronous, non-blocking): the remaining off-axis measurements, the directivity index, multi-driver sum calculations, and clipping detection.
The main graph always updates immediately for the selected angle, and the UI stays responsive during background work.
Optimization Recommendations
For slower systems or very long filters (> 8192 taps):
- Reduce plot resolution — Settings → Graphs → Plot resolution (16k or 32k)
- Limit off-axis measurements — reasonable angle increments (10 or 15°); on a large multi-driver project, capture polar sets only for the drivers that need directivity analysis
Performance is always good for: projects with standard filter lengths (≤ 4096 taps), IIR-only filtering, single on-axis measurements, and modern multi-core CPUs.
Best Practices
Performance
- Slower systems — reduce plot resolution to 16k / 32k points
- Large systems — keep FIR lengths moderate and work section by section with Solo / Disable
Filter design
- Keep Auto causal alignment enabled unless you need precise manual IR positioning
- Keep Show manual FIR delay compensation disabled unless you are experienced with FIR alignment
- Keep Clipping detection on during design; test with real content before deploying
Graph display
- Enable truncation for cleaner phase / GD plots
- Enable Steep crossover smoothing to read true crossover slopes